ARCHIVED: Guide to Polycom VVX500 series IP phones
On this page:
- Diagram of phone
- Make phone calls
- Transfer a call
- Forward calls
- Access voice mail
- Park and retrieve a call
- Add a contact
- Initiate a conference call
- Update your presence
- Troubleshoot
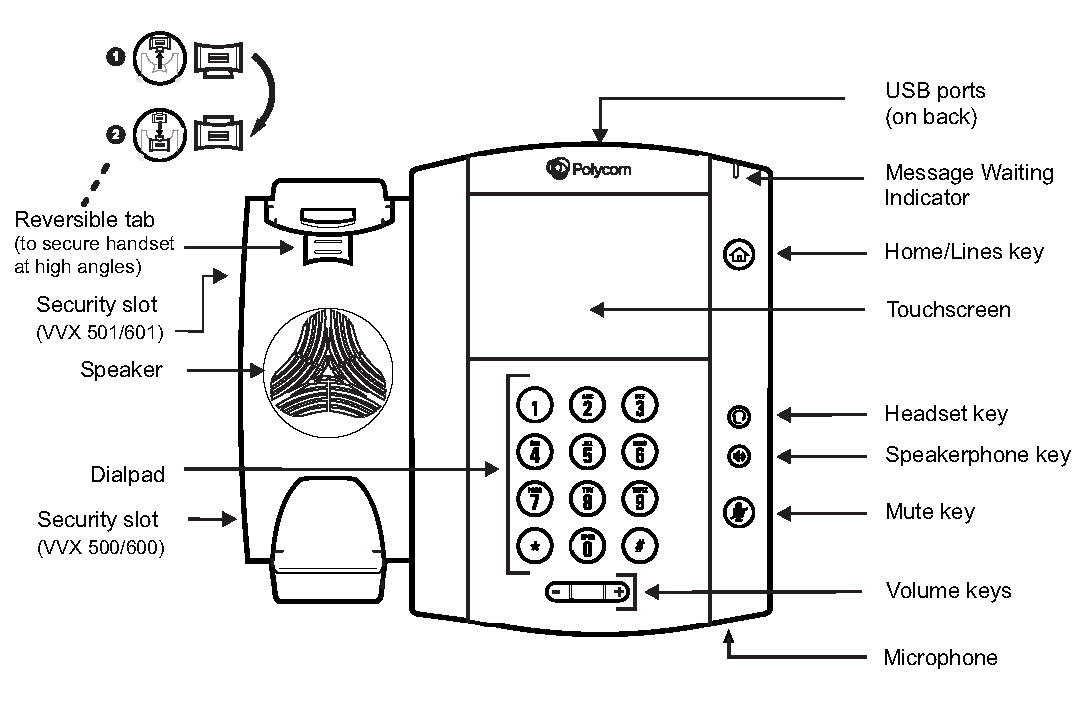
Diagram of phone
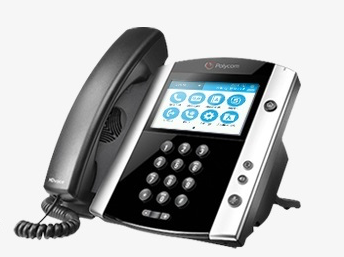
Polycom VVX500 series phones are IP phones that work with Indiana University's UniCom service for Enterprise Voice users. You can use the phone in conjunction with Skype for Business on your computer, or just use the phone, as follows.


Make phone calls
Dial numbers as follows, either lift the receiver or press the Speakerphone key, and then touch the green phone icon on the screen.
- On-campus calls (IUB and IUPUI): To call any number on the IUB or IUPUI campus, dial only the last five digits (for example, 5-XXXX, 6-XXXX, 7-XXXX, 8-XXXX, or 4-XXXX).
- On-campus calls (regional campuses): To call a number on your campus, dial only the last four digits. To call a number on another IU campus, dial the area code plus the seven-digit number. Do not dial 9 before the number.
- Off-campus local calls: To call a local off-campus number, dial the area code plus the seven-digit number. Do not dial 9 before the number.
- Direct dial long distance calls: To make a long distance call to an area code in the US, Canada, or another nation or US territory in the North American Numbering Plan (NANP), dial the area code plus the seven-digit number. Do not dial 9 before the number.
- International calls: To make a long distance call to a nation outside the NANP, dial 011 plus the international number. (You may see the numbers 256 before the 011 on your display.) Do not dial 9 before the number. When you hear the stutter dial tone, enter your Authorization Code.
Transfer a call
- While on an active call, touch the transfer icon on the bottom.
Enter a phone number on the phone keypad and touch the green phone icon. Alternatively, you can select the contacts icon in the menu at the bottom of the screen and touch a name from your contact list and touch the dial icon. If your default transfer type is "Blind" the call will immediately transfer. If your default transfer type is "Consultative" you will be able to speak to the caller and then touch transfer again to send the call.
Setting the default transfer type:
- Press the Home button, and on the touch screen, select . (You may have to scroll to the right to see the settings icon.)
- Touch , and then touch . Scroll down to "Default Transfer Type".
- Touch (Default) or .
- Touch the button a few times until you are back to the main screen.
Forward calls
You can configure your phone so that all incoming calls are forwarded to another number or one of your contacts. You can also forward calls while the phone is ringing.
- To forward incoming calls to a contact:
- Touch in the bottom menu, and then touch .
- Enter your contact's 10-digit telephone number and touch , or touch , choose a contact, and touch .
- To forward incoming calls to voice mail, touch , and then .
Access voice mail
For voice mail instructions, see ARCHIVED: Access your voice mail in UniCom Enterprise Voice.
Park and retrieve a call
The Call Park feature gives UniCom allows you to place active calls in a holding queue, or parking lot, where you can retrieve the calls using a special number displayed by UniCom. Unlike a call placed on hold, a parked call can be retrieved from the queue by phone or client logged into UniCom by dialing that retrieval number. You can park up to eight active phone calls.
Parking a call
During an active call, touch . Parked calls are given orbit numbers (for example, #1023) to retrieve the call.
Retrieve a call
Anyone logged into UniCom can retrieve the call with the orbit number from any UniCom phone or client. To retrieve a parked call, do one of the following:
- On your phone, touch .
- On another phone, touch and dial the call's orbit number.
Add a contact
When you add contacts in your Skype for Business client, those same contacts display on the > > screen on your phone.
To add contacts to your phone:
- Touch , and then touch .
- Touch , enter your contact's email address (for example,
networkID@iu.edu), and touch . Contacts added directly to the phone will be added to your UniCom client and visa-versa.
Add a quick dial to Home screen
When you add contacts as favorites in your Skype for Business client, those same favorites display on the screen on your phone as a touch-to-call icon.
Initiate a conference call
Initiate a Skype for Business conference call with Skype for Business contacts or a group of contacts from your phone.
To initiate a conference call:
- Touch , and then touch .
- Select a contact and touch .
- Touch to add additional contacts.
To initiate a conference call with a group:
- Touch , and then touch .
- Select a group and touch .
Update your presence
Your presence status information automatically updates when you are actively using your phone or it's inactive. You can also manually update your presence status at any time.
To update your presence status, touch and select your desired status. You can change your status to from any other status by selecting .
Troubleshoot
If you have problems with your VVX500 (for example, trouble making or receiving calls, or names and phone numbers are not displaying correctly), for a few seconds disconnect and reconnect the power (via either the network cable and/or power supply), and wait while the phone reboots itself. You may then be prompted to sign in via your computer screen. The phone should reboot back to its normal state. If problems persist, contact your local IT Professional or campus Support Center.
This is document aosn in the Knowledge Base.
Last modified on 2023-07-12 14:16:45.