Use WinSCP to connect to Sitehost
On this page:
Use WinSCP to connect to Sitehost
To log into your Sitehost account using WinSCP (an sFTP client for Windows):
- Connect to the IU Groups VPN using your personal IU username and passphrase, and select your device from the "Connect to the VPN" section.
If prompted to select a role, choose the
IU-Linux-Hosting-Usersoption. - Open the WinSCP client.
- In the Host Name (or IP address) field, enter the hostname for the server you want to connect:
- Production Sitehost:
ssh.sitehost.iu.edu - Test Sitehost:
ssh.sitehost-test.iu.edu
- Production Sitehost:
- Enter your group account credentials:
- Username: The name of your web account
- Password: Your group account passphrase
- To retain your settings, select and enter a site name.
- Select .
Note:The first time you connect to Sitehost, you will be asked to verify the server. Select .
Use SSH keys to connect to Sitehost via WinSCP
To log into your Sitehost account using SSH keys via the WinSCP client (available from IUware):
- If needed, first refer to Generate and use SSH keys with Sitehost.
- Connect to the IU Groups VPN using your personal IU username and passphrase, and select your device from the "Connect to the VPN" section.
If prompted to select a role, choose the
IU-Linux-Hosting-Usersoption. - Launch WinSCP, and then, in the "Login" window:
- On the left, select .
- On the right:
- In the "Host name" field, enter the hostname for the appropriate server:
- Production Sitehost:
ssh.sitehost.iu.edu - Test Sitehost:
ssh.sitehost-test.iu.edu
- Production Sitehost:
- In the "User name" field, enter the group account username.
- Leave the "Password" field blank.
- Under the "Password" field, select .
- In the "Host name" field, enter the hostname for the appropriate server:
- In the "Advanced Site Settings" window:
- Under , select , and then select the at the end of the "Private key file" text field to find and select your private key.
- Under , select , and then make sure is not selected. Also, if applicable, delete any existing directory path from the "Remote directory" field.
- Select .
- In the "Login" window, on the right, under "User name", select .
- In the "Save session as site" window, in the "Site name" field, enter a name for your connection, and then, at the bottom, select .
- Select .
Note:The first time you connect to Sitehost, you will be asked to verify the server. Select .
Error messages
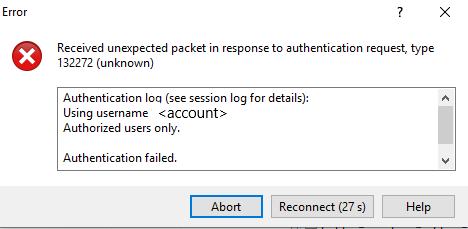
If, when attempting to transfer files to Sitehost, you encounter an error message similar to the following, you may have reached your Sitehost disk space quota:
Received SSH2_MSG_CHANNEL_DATA for nonexistent channel 0
Received unexpected packet in response to authentication request, type 132272 (unknown)
Authentication log (see session log for details):
Using username <username>
Authorized users only.
Authentication failed.

For details on disk space storage quotas, see Sitehost, Pages, and MySQL disk space quotas.
This is document ayed in the Knowledge Base.
Last modified on 2023-08-02 15:58:08.
