Customize your advisor profiles in AdRx
On this page:
Overview
Campus administrators create and manage AdRx profiles for staff within their groups or units. An AdRx profile includes a role, which is assigned at the exec level and based on the security group to which you belong (exec, admin, advisor, or staff).
All AdRx roles have specific features (information/functionality on pages) associated with them; the exec group turns features on or off by role. Almost all features are enabled for the Administrator, Supervisor, Advisor, and Faculty roles.
Some features of your AdRx profile may have settings that let you customize functionality. You can set these customizations in .
For information about notes customizations, see:
AdRx profile customization
Go to AdRx, click , and follow any login prompts.
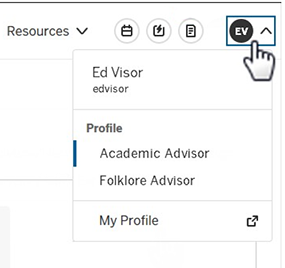
- On the AdRx landing page, in the upper right, click the icon (the circle with your initials) to expand the AdRx profile menu.
 Note:If you have multiple profiles, you can click to select another profile to manage. Selecting another profile here also sets it as your active profile in AdRx.
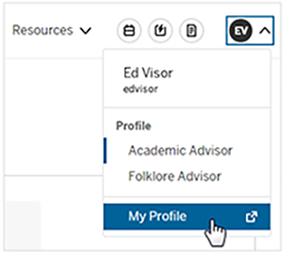
 - Click .

- On the My Profile page, on the left, make sure is selected.
Note:
- If your active profile is SAS-enabled, the customization menu also will be available.)
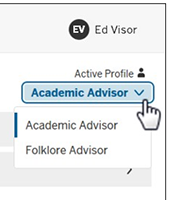
- If you have multiple profiles, you can switch to a different profile; click the down arrow next to active profile, and then select the desired profile; for example:

- On the right, you'll see options for and .

- Click the arrow to expand for access to nickname and resource customizations.

Create and edit profile nicknames
By default, AdRx profiles have names that include your AdRx role and AdRx group (for example, "Academic Advisor/School of Public Health"). You can create nicknames for each profile to help you more easily identify them.
- On the My Profile page, make sure is selected on the left and is expanded on the right.
- Click the arrow to expand , and then click .
- Enter a nickname (for example,
Writing Advisor), and then click .
You can do this for each of your profiles. For example, you can set profile #1 to Psychology Advisor and profile #2 to Sociology Advisor.
The profile nicknames you set will visible to you (on your AdRx landing page) and to those in your team calendar (when they are helping to make or revise appointment slots. Profile nicknames are not visible to students.
To edit an existing profile nickname:
- On the My Profile page, make sure is selected on the left.
- On the right, under "Profile Customization", click the arrow to expand , and then click .
- Enter a new nickname for the profile, and then click .
Add links to frequently used web resources
You can add up to 20 web links to your AdRx profile for convenient access to frequently used online resources.
- On the My Profile page, make sure is selected on the left and is expanded on the right.
- Click the arrow to expand , and then click .
- In the fields provided, enter a title for the web resource and its complete URL, and then click .

To change or remove an added resource, return to , and then click the corresponding or for the resource in question.
This is document bhla in the Knowledge Base.
Last modified on 2023-07-24 13:12:00.