Create accessible tables in Microsoft Word
On this page:
Overview
In Microsoft Word, it is important to make sure all tables are accessible to those using screen readers. This helps those using screen readers to make sense of the data contained in a table. You should only use a table when it's necessary to convey relationships between pieces of data, and not for layout purposes. When using tables in a Word document, keep them as simple as possible. If necessary, split complex tables into multiple smaller tables. Be sure to designate a header row and use column headings to help describe the data in the table, as well as repeat the column headings on each page the table appears on. You should also ensure the table has alternative text, to describe the contents of the table for those using screen readers.
Designate a header row
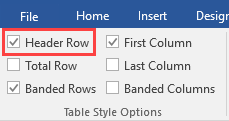
There are multiple parts to the process of making a table accessible. The first involves making sure the table has a header row designated. The "Table Style Options" section of the ribbon on the contextual tab lets you indicate that your data has a header row.

To add a table with a header row to a Word document:
- On the ribbon, select , and then select .
- Choose how many rows and columns you want for your table.
- On the ribbon, in the "Table Tools" group, select .
- In the "Table Style Options" group, make sure is checked.
Column headings
Column headings help describe the content in a table, and should be present to help users understand the content.
To add column headings to a table in Word:
- Place your cursor in the first cell of the top row of the table.
- Type the name for the first column, and select to move to the next column.
- Repeat step 2 for the remaining columns.
Repeat column headings
Column headings should be repeated at the top of a table if the table spans multiple pages.
To repeat the column headings:
- Right-click the table, and then select .
- In the "Table Properties" dialog box, select the tab.
- In the "Options" group, make sure is checked.
- Uncheck the box next to .
- Select to accept the changes.
Alternative text
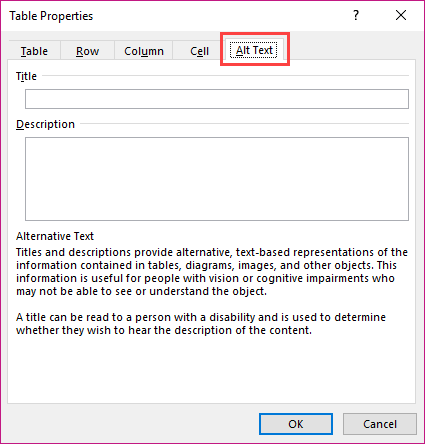
To add alternative text for tables, use the tab of the "Table Properties" dialog box:

- Right-click the table, and then select .
- In the "Table Properties" dialog box, select the tab.
- Fill in the description for the table and, if necessary, add a title for the table.
- Select to accept the changes.
This is document aqjl in the Knowledge Base.
Last modified on 2024-06-14 16:40:46.