ARCHIVED: Legacy MySQL for Webserve first-time setup guide
Although Legacy MySQL for Webserve accounts are no longer being created, this information is being made available for users who may have a Legacy account and need to configure their account in the future. When your MySQL account is ready, Web Services Support will contact you with a port number and root password for your production and test MySQL accounts. Once you have this information, follow the steps below to set up your account for use. For more about creating a MySQL account, see ARCHIVED: Legacy MySQL for Webserve user guide.
- Log into your MySQL account and start your MySQL server.
Note:For this step, you will need to use an SSH command line client, such as PuTTY (Windows) or Terminal (Mac). Terminal is part of the Mac OS and does not require a download; you can get PuTTY from IUware.
To connect to your MySQL account, open your SSH client and specify the following:
Host Name: mysql.iu.edu (or mysql-test.iu.edu if connecting to your test account) Username: same as your Webserve account username Password: same as your Webserve account passphrase
Following are screenshots of the process for PuTTY and Terminal. If you are using another SSH client, consult its documentation.
- Using PuTTY:
- Open PuTTY and fill in the hostname, and then click .
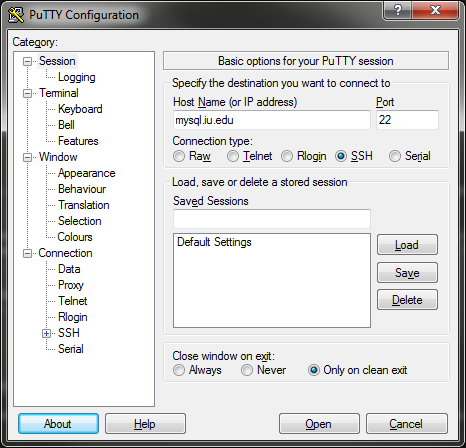
- Next to "login as:", type your MySQL account name and press
Enter. You will receive an "Access denied" message and a prompt to enter your password. The screen will not change and the cursor will not move when you enter your password, but the window is accepting your input.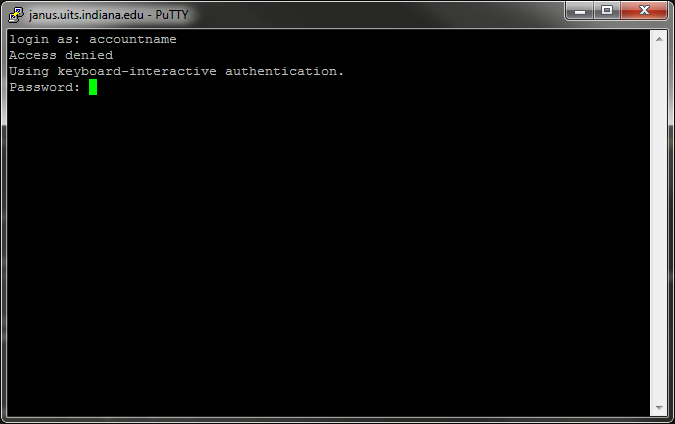
- Once you have logged in successfully, type the following command to start your server:
janus:account> cmd_mysql start
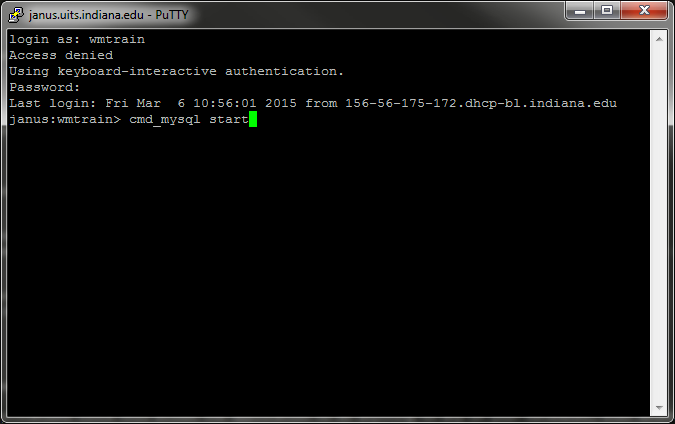
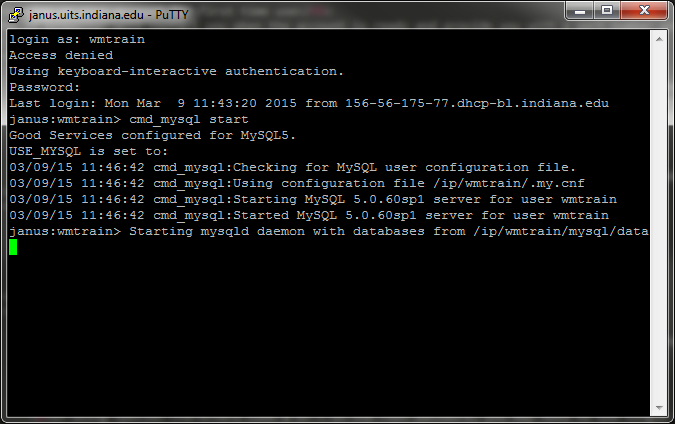
- You should see several messages indicating the progress of the server starting. You may close the program.
- Open PuTTY and fill in the hostname, and then click .
- Using Terminal:
- Open Terminal and type the following command, replacing
accountnamewith your actual MySQL account name:ssh accountname@mysql.iu.edu
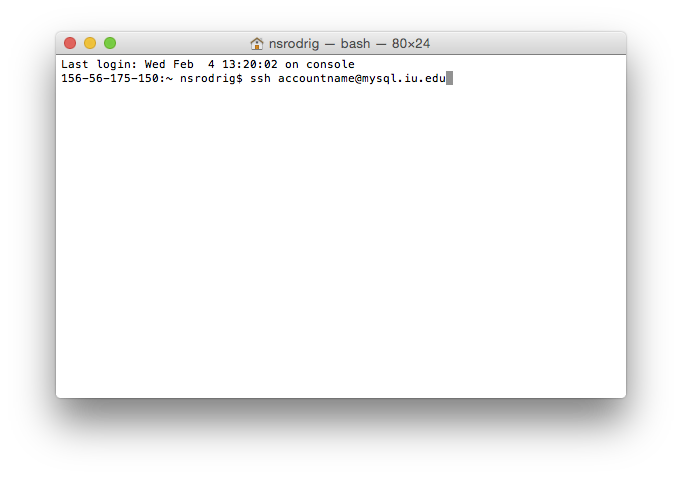
- After hitting
Return(Enter), you will be prompted for your password. The screen will not change and the cursor will not move as you enter your password, but the window is accepting your input.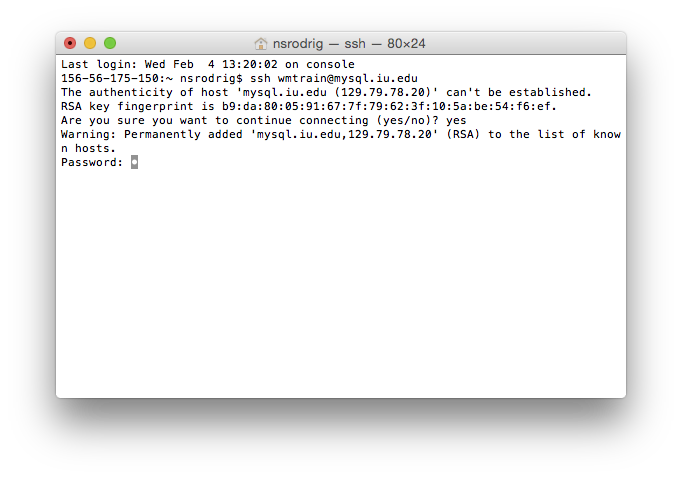
- Once you have logged in successfully, type the following command to start your server:
janus:account> cmd_mysql start
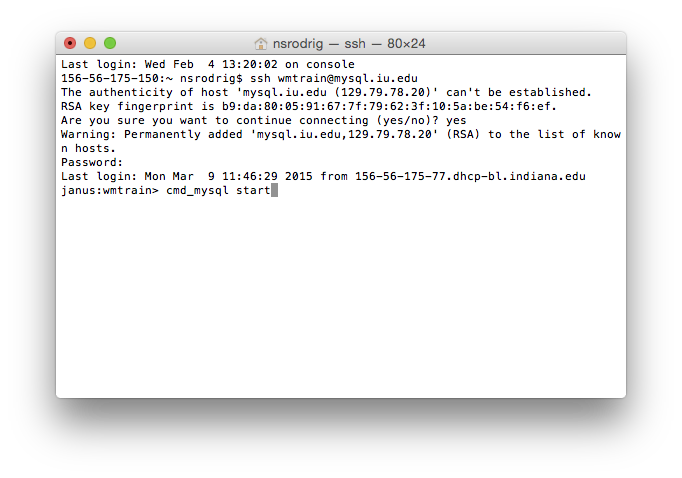
- You should see several messages indicating the progress of the server starting. You may close the program.
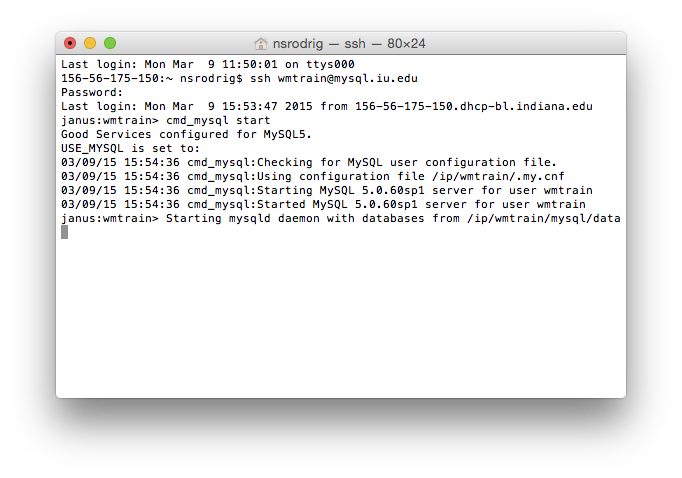
- Open Terminal and type the following command, replacing
- Using PuTTY:
- Log into your Webserve account and install phpMyAdmin.
- Open your SSH command line client of choice and log into your Webserve account. For detailed instructions on connecting to Webserve, see ARCHIVED: Publish to Webserve.
- phpMyAdmin must be installed within the
wwwsdirectory. To move into yourwwwsdirectory, type the following command:webserve:account> cd wwws
If your account does not have a
wwwsdirectory, refer to the Secure WWW server for information on creating this necessary directory. - Install phpMyAdmin by typing the following:
webserve:account> install_phpmyadmin
The phpMyAdmin directory is CAS protected, using your Webserve account credentials. Be sure to log in to phpMyAdmin with your Webserve username and passphrase, not your personal credentials.
At this point you may close the SSH client.
- You will need to edit the
config.inc.phpfile before running phpMyAdmin. Using Siteshare or your preferred SFTP program, log into your Webserve account and locate the file to edit it. The path to the file should bewwws/phpmyadmin/config.inc.php.Note:If you are unfamiliar with SFTP, see ARCHIVED: Publish to Webserve for information on SFTP connections to Webserve using WinSCP (Windows) or Cyberduck (Mac), or contact Web Services Support for further assistance.As you edit the file, make sure lines do not wrap as a result of your edits. If you notice the line wraps as you enter information, correct the line so that it does not wrap.
Below is the section of the
config.inc.phpfile that you need to edit in order to establish a database connection. Replace username withroot, andport numberandpasswordwith the port number and password provided to you by Web Services Support at account creation.$cfg['Servers'][$i]['host'] = 'mysql.iu.edu'; // MySQL hostname $cfg['Servers'][$i]['port'] = 'port number'; // MySQL port $cfg['Servers'][$i]['extension'] = 'mysql'; $cfg['Servers'][$i]['connect_type']= 'tcp'; $cfg['Servers'][$i]['compress'] = false; $cfg['Servers'][$i]['auth_type'] = 'config'; $cfg['Servers'][$i]['user'] = 'username'; // MySQL user $cfg['Servers'][$i]['password'] = 'password'; // MySQL password
By default, the
config.inc.phpfile has three blocks: one for connecting to the MySQL production server (mysql.iu.edu), one for connecting to the test MySQL server (mysql-test.iu.edu), and a blank one. The test server and blank ones are commented out; if you wish to establish connections beyond the first block, you will need to remove the//tags. Below is an example of the block with the comment tags still present.//$cfg['Servers'][$i]['host'] = 'mysql-test.iu.edu';//MySQL hostname //$cfg['Servers'][$i]['port'] = ''; // MySQL port //$cfg['Servers'][$i]['extension'] = 'mysql'; //$cfg['Servers'][$i]['connect_type']= 'tcp'; //$cfg['Servers'][$i]['compress'] = FALSE; //$cfg['Servers'][$i]['auth_type'] = 'config'; //$cfg['Servers'][$i]['user'] = ''; // MySQL user //$cfg['Servers'][$i]['password'] = ''; // MySQL password
If you edited the file directly on the server, be sure to save your changes. If you downloaded the file to edit it, be sure to save your changes AND upload the newly edited file.
- Create MySQL user(s) and assign privileges using phpMyAdmin.
Important:You should not use the
rootMySQL username to make a connection from your web applications, since this allows the application to do anything to any of your databases, even delete them entirely. It is also a security risk. Other MySQL users with reduced privileges granted to them should be created instead.- Log into phpMyAdmin using the following address, replacing
accountwith your Webserve account name (leave the tilde):https://www.iu.edu/~account/phpmyadmin. - Once you've logged in, click the tab in the top row of your dashboard.
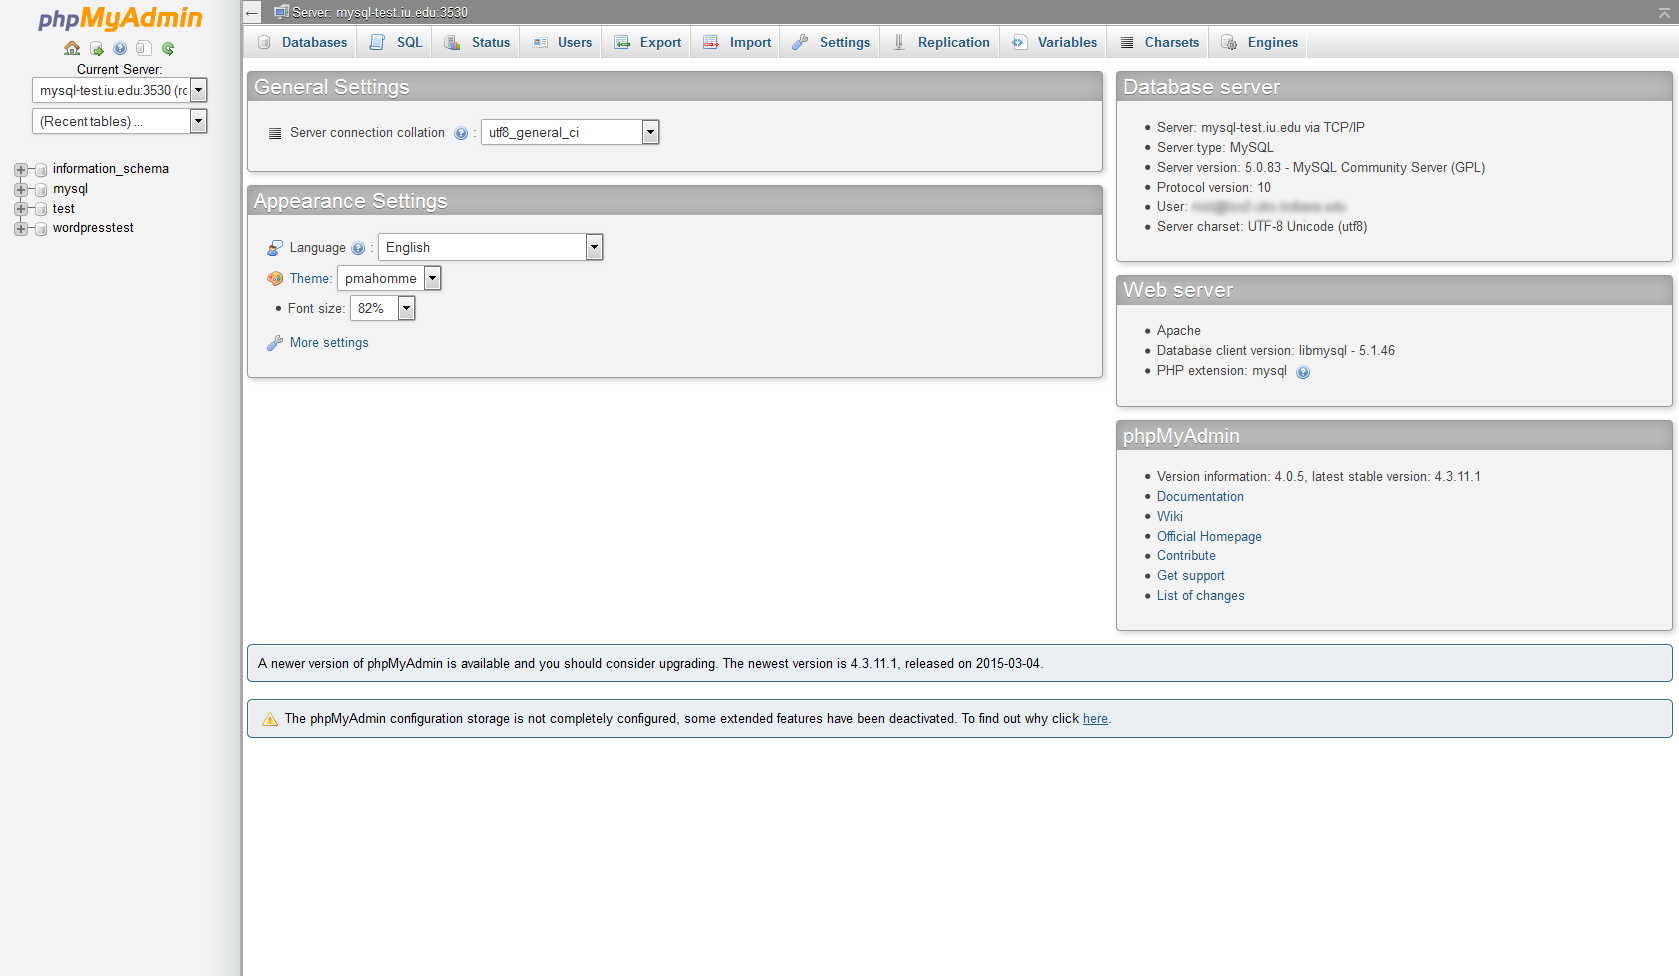
- On the "Users overview" page, click the link below your user list.
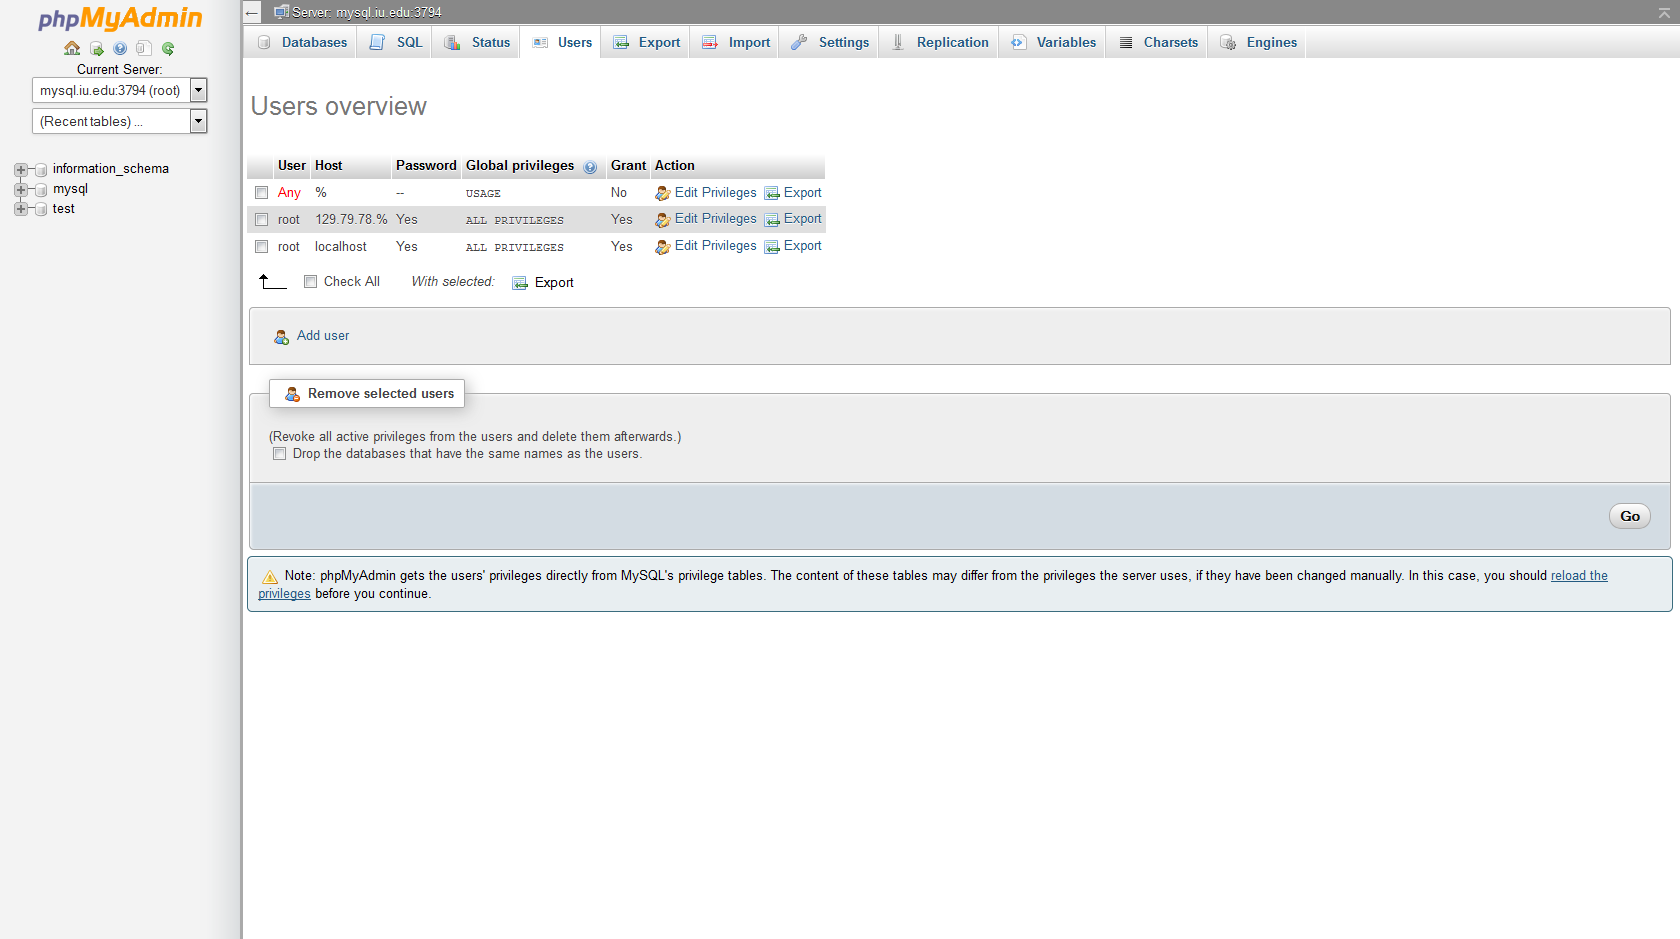
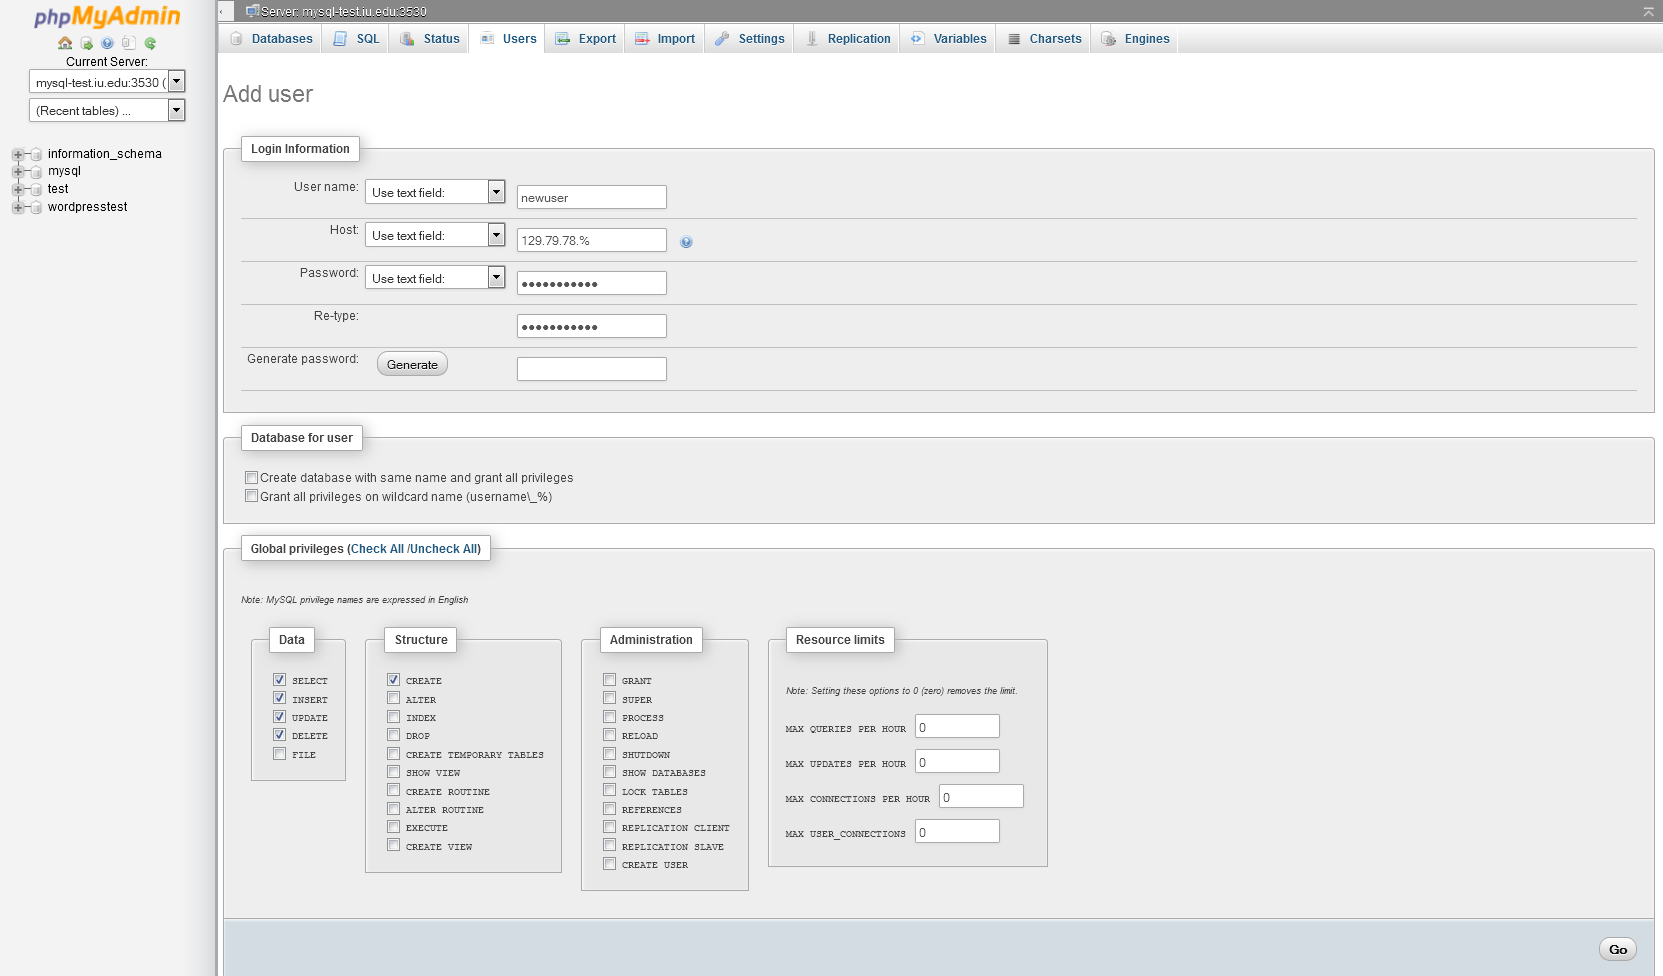
- Fill out the "Add user" page as desired, and click the button at the bottom right. The screenshot below is an example of how one might fill out this page; the value in the "Host" field is what one would enter to allow the new user to connect to MySQL from Webserve:
- Log into phpMyAdmin using the following address, replacing
- Your account is now ready for use.
You may make database connections in your web applications using the username/password combination(s) you set in the step above. You may also perform further database administration tasks in phpMyAdmin, such as creating and deleting databases and tables, changing user passwords and privileges, etc.
This is document bfpd in the Knowledge Base.
Last modified on 2021-09-08 10:18:37.