Email a group of students using Caseload in AdRx
On this page:
Overview
As an authorized AdRx user, you can access Caseload to send email messages to all students in a group or to students in a subset of that group. Caseload also allows you to add an advising note to some or all student records without sending an email message. Email functionality is available in Caseload's and tabs.
Email messages sent through Caseload are automatically saved in the record of every student on the list of recipients.
AdRx uses the IU Notifications system to send email. Messages are typically processed immediately, but in times of extremely high use, there may be delays of up to four hours. You may want to copy yourself on any message you send so you'll know exactly when students received it.
Send email via Caseload
To send email messages via Caseload:
- From within a group, select the student(s) to email:
- To select an individual student, select the checkbox next to their name.
- To select all students, check .
- To select students who share characteristics, use Caseload filters to identify those students.
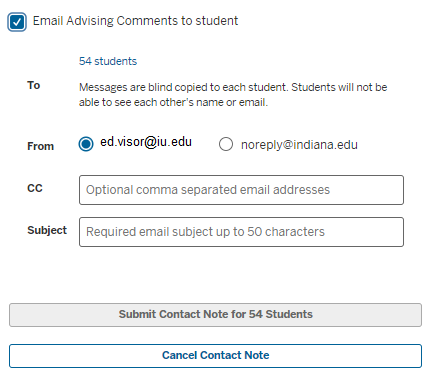
Note:The "To" field in a Caseload email message functions like a "BCC" field; when you send email via Caseload, all selected student email addresses are loaded into the "To" field, but students receiving the message only see their own name. Caseload also provides a standard "BCC" field.
- After you've selected all appropriate recipients, select .
- The standard contact note slide-in will appear, with "Contact Type" automatically set to . After you enter at least one tag and some/all text to the body of the advising comment, check .

- In the "Subject" field, enter a subject for the message.
- Set the message's "From" field. By default, your email address is selected, but you can select to change the "From" address to a no-reply account.
- If you're sending the message to more than one student, you can select in the alert at the top to view all recipients.
- Once you've composed your message and it's ready to send, select . This button will be activated after you've entered text in the "Subject" and "Body" fields.
This is document bhjo in the Knowledge Base.
Last modified on 2024-06-14 12:06:53.