Send custom notifications to Canvas Guest account recipients
On this page:
- Overview
- Format the message properties file
- Sample message properties file and rendered message
- Preview your message before you send
Overview
When new IU Guest accounts are created via the Canvas third-party provisioning process, a generic invitation is sent to each guest to complete the account registration process. You can also send an optional custom email message to each new guest Canvas user by uploading a text file named message.properties along with your users.csv file. Your custom message will be sent to all users created with the users.csv file.
To use this feature, the email address of the message sender must be added to a database of authorized senders. To request that a new sender be added as an authorized sender, email the UITS LMS Development team at lmsreq@iu.edu.
Format the message properties file
Use a plain text editor (not a word processor like Microsoft Word) to create the message.properties file. The name of the file should be exactly as written with no file extension. Also, the file must be formatted properly or the notification will not be sent. The file consists of three key/value pairs, each on a separate line; all keys and values are required:
| Key | Value |
|---|---|
sender=(required) |
A valid, authorized sender email address |
subject=(required) |
Subject of the email message |
body=(required) |
Body of the email message. Blank lines are not permitted and special formatting is required to insert line breaks and blank lines, as well as to indicate continuation of the message. Use the following codes to format your message:
|
Sample message properties file and rendered message
Below is an example of a message.properties file and the resulting formatted message to be sent to recipients.
Original message.properties file
The message.properties file uses soft wrapping to wrap the text of longer lines. The only line breaks in the file occur after the \n\, \n\n\, and \ codes.
sender=tjohnson@abcu.edu
subject=Invitation to create an Indiana University Guest Account
body=\
Greetings.\n\n\
\
Today you will receive an email invitation from Indiana University to create an IU guest account. Look for the invitation in your email inbox and complete the account registration process within 30 days.\n\n\
\
This account will give you access to continuing education courses for high school teachers on a variety of topics through IU Expand, an online portal for non-credit courses offered by Indiana University (https://expand.iu.edu)\n\n\
\
You have also been pre-enrolled in the following courses:\n\n\
\
* Teaching for Student Success: An Evidence-Based Approach\n\
* Student Academic Integrity and Faculty Responsibilities\n\n\
\
Please feel free to contact me if you have any questions or concerns.\n\n\
\
Sincerely,\n\n\
\
Thomas Johnson, Professional Development Coordinator\n\
ABC University
Formatted message sent to recipients
The message.properties file above produces the following formatted message.
Subject: Invitation to create an Indiana University Guest Account
Greetings.
Today you will receive an email invitation from Indiana University to create an IU guest account. Look for the invitation in your email inbox and complete the account registration process within 30 days.
This account will give you access to continuing education courses for high school teachers on a variety of topics through IU Expand, an online portal for non-credit courses offered by Indiana University (https://expand.iu.edu)
You have also been pre-enrolled in the following courses:
* Teaching for Student Success: An Evidence-Based Approach
* Student Academic Integrity and Faculty ResponsibilitiesPlease feel free to contact me if you have any questions or concerns.
Sincerely,
Thomas Johnson, Professional Development Coordinator
ABC University
Preview your message before you send
It's a good idea to review a copy of your message to ensure the formatting and content are correct before you upload the message.properties and users.csv files to the secure FTP server. To receive an exact copy of the message that will be sent to each user in the users.csv file, follow the instructions below. These instructions guide you through the process of making a call to a locally developed API with Insomnia, a freely available, cross-platform REST client. You can use a different REST client if you prefer.
- If you have not done so already, download and install Insomnia on your local device.
- Open Insomnia. You should see three panels. The one on the left is for creating and organizing API requests. The middle panel is for configuring individual requests, and the panel at the right is for viewing the results of an executed request.
- In the left panel (also called the sidebar), select (the plus sign), and then select from the drop-down menu:
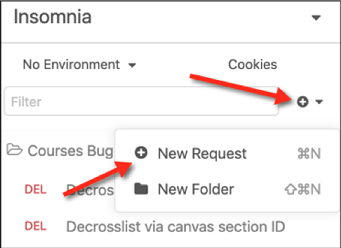
- In the "New Request" pop-up window:
- Enter a name for your new request.
- Change the request type from to .
- Using the drop-down menu, set the body type to .
- Select .

Your new request will appear in the left panel below the "Filter" box:
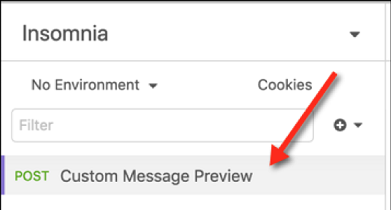
- If your new request is not already selected, select it. Then, select the first tab in the middle panel; this tab is for defining the body of the request. It should already be set to (if you selected that option in step 4 above):
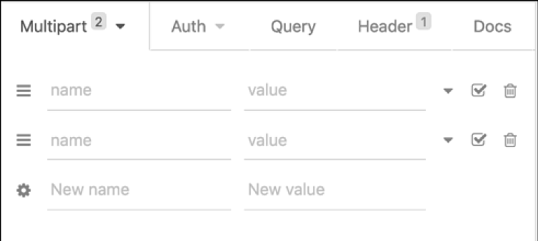
- Add two fields to the form by filling in the name/value pairs as described below:
- In the first "name" box, enter
departmentin all lowercase. Then, in the "value" box, enter the abbreviation of the department for which you have been authorized (for example, IUSM, IUSO, ELA, etc.). - In the second "name" box, enter
messagePropertiesFilewith capitalization exactly as shown. Then, to the right of the "value" box, select the downward-pointing arrow. This will change the field type to a file upload.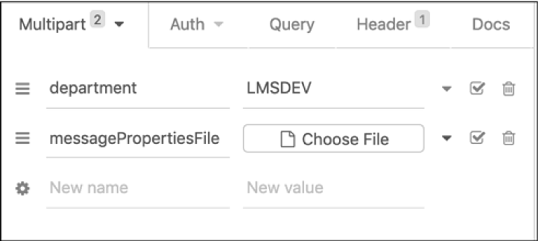
- In the first "name" box, enter
- In the form, select and select the
message.propertiesfile on your local or cloud storage device. - In the middle panel, select the tab. This tab should already be populated as a result of your previous selections. If it isn't, in the "New Header" box, enter
Content-Type, and in the "New Value" box, entermultipart/form-data.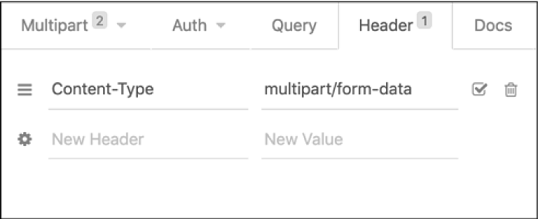
- At the top of the middle panel, in the box for the request URL, enter or paste the following URL:
https://canvas.iu.edu/lms-prd/v1/dept_message_tester/validate - Select to initiate the request. If your request was successful, a copy of the message will be sent to the sender listed in the
message.propertiesfile, and you'll see "test email sent" in the Insomnia results panel on the right: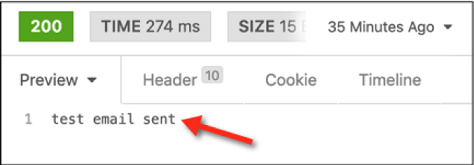
If there was a problem with the
message.propertiesfile, you will see an error message in the results panel and the preview email will not be sent. Fix the problem, attach the revised file, and try again.
This is document baks in the Knowledge Base.
Last modified on 2024-07-18 14:56:45.