Manage appointment and activity campaigns in AdRx
On this page:
- Overview
- Campaign cards on the AdRx Student Information page
- Actions in appointment and activity campaigns
- Actions only in appointment campaigns
- Actions only in activity campaigns
Overview
In Advising Records (AdRx), campaigns let you target specific groups of students, communicate a required action for them to take, and track student participation in the action by their engagement with a particular IU software tool such as SAS or Kiosk.
Most AdRx users have two options available for campaigns:
- Appointment campaigns: Students are asked to take action by scheduling a meeting with an advisor.
- Activity campaigns: Students are asked to participate in a targeted activity.
Appointment and activity campaigns provide similar ways of managing open campaigns: campaign cards, add students, remove students, and messaging. Some appointment campaign details can be edited once the campaign is open; additionally, you can count non-SAS appointments toward campaign requirements and manually mark appointment attendance. Activity campaign requirements can be manually set to complete and then reverted, as needed.
Campaign cards on the AdRx Student Information page
Campaign cards display on the AdRx Student Information page. These cards contain campaign details that vary depending on your access:
- If you have student data access, you'll see basic details about any campaigns a student is part of.
- If you don't have student data access, you'll only see basic details about any campaigns for which you are a manager and which also include that student.
- If the student is involved in campaigns for which you're not a manager, you'll see the number of campaigns but no details.

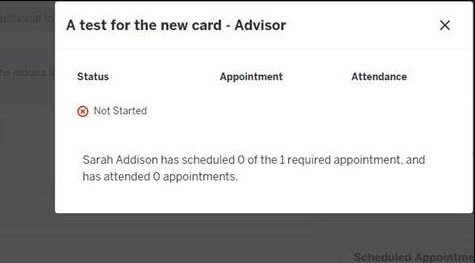
Following are examples of campaign card information you can view:
- Click the name of the campaign to reveal more details.

- Click to show all the managers for that campaign.

- If you don't have student data access, you'll see if the student is part of a campaign for which you're not a manager.

Actions in appointment and activity campaigns
Add students to a campaign
You may add students to open campaigns at any time. Campaign statistics will automatically adjust to include the newly added students.
- From the tab, click the campaign name to open the campaign progression page.
- In the "Overview" section, click .
- You can add students in bulk by using a caseload group or by searching for them individually; for help, see Create an appointment campaign in AdRx.
- When you have created the list of students to add, click . A confirmation displays at the top of the progression page for 10 seconds. This message contains the number of students that have just been added to the campaign.
- Campaign staff must now email the newly added students to inform them of their participation in the campaign, provide the campaign requirements, and provide the link to SAS Student for scheduling.
For help, see Send additional campaign email messages.
Remove students from a campaign
You may remove students from a campaign at any time. Doing so will not remove the student from any email messages previously sent from the campaign. Campaign statistics will automatically adjust to accurately reflect the current number of students and their progress within the campaign.
- From the tab, click the campaign name to open the campaign progression page.
- To delete one student: To the right of the student's name, click the vertical ellipses (
 ), and then select .
To delete multiple students: Check the box next to the name of each student you wish to remove, and then, above the list of students, click .
- Click to confirm. Removed students will no longer display on the progression page and will not be included in any statistics.
View campaign messages
Campaign managers may view all campaign email messages sent from AdRx. To do so:
- From the tab, click the campaign name to open the campaign progression page.
- Click the tab.
You can view email messages sent from closed campaigns, allowing you to copy and paste from campaign to campaign. Messages display in preview mode and are sorted by date sent, with the most recently sent at the top. From this page, you can view the date sent, who the message was sent from, the recipients, and part of the message body. Click the down arrow (  ) to see the full email content.
Send additional campaign email messages
You can send additional email messages from open campaigns at any time. You may send an email message to one student, multiple students, or all students in the campaign. In the future, you will be able to filter on different values. You can either craft a new email or send a message that has been sent previously.
- Compose a new email message: To send a new email message to one or more students:
- From the tab, click the campaign name to open the campaign progression page.
- On the campaign progression page:
- To add a single student: To the right of the student's name, click the vertical ellipses (
 ), and then click .
 - To add multiple students: Check the box next to each student's name; alternatively, check to email all students. Above the student list, click , and then click .
- To add a single student: To the right of the student's name, click the vertical ellipses (
- The "To" field displays either the student's name (if you added only one student) or the number of students you added. To see a complete list of students, click the number.
- Select whom you want the email to be "From". The default is
noreply@iu.edu, but you can change this to any campaign staff member. - Add a subject and content for the body of the email message.
- Click . A success message will display at the top of the progression page for 10 seconds.
You can review sent email in the tab. Messages are sorted in descending order by date.
- Send a previous message:
To keep messaging consistent and reduce the risk of typos, resend the kick-off email to students who have been added to an existing campaign. The process is similar to composing a new message:
- From the tab, click the campaign name to open the campaign progression page.
- On the campaign progression page:
- To add a single student: To the right of the student's name, click the vertical ellipses (
 ), and then click .
 - To add multiple students: Check the box next to each student's name; alternatively, check to email all students. Above the student list, click , and then click .
- To add a single student: To the right of the student's name, click the vertical ellipses (
- Select the message you want to send. You cannot change any of the content or settings in a previous message.
- If you want to send email from a different campaign staff member, you'll have to create a new email message. In the tab, select the desired message, open it completely to copy the body of the previously sent email, select the appropriate student population, and then paste the previously sent email text into a new message.
Actions only in appointment campaigns
Edit campaign details
You can only edit open campaigns. Because students have access to schedule campaign appointments, you can modify some but not all information about a campaign.
To edit a campaign:
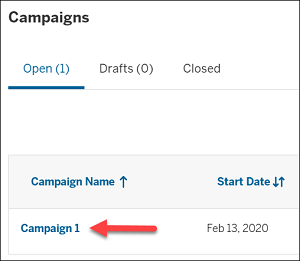
- From the tab, click the campaign name to open the campaign progression page.

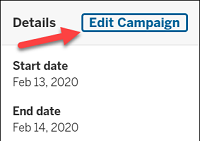
- In the "Details" section, click .

The fields you can modify are:
- End date: You may only extend this date. Consider closing the campaign if you expect no further activity.
- Tags: You may add tags but cannot remove any that were added before the campaign was opened.
- Managers: You may add or remove managers at any time. Only AdRx users from your unit may be added.
Important:
Because of unit turnover, illnesses, and other unforeseen absences, it's best to include an advising administrator or at least one other unit advisor on every campaign. If an advisor opens a campaign with no other managers and then is out or leaves the unit, that campaign will be in limbo.
Some colleagues may have more than one profile on your unit. Remove any profiles for that person that do not apply to this campaign. Managers can only be listed once.
Count a non-SAS appointment towards campaign requirements (set time)
Campaign users may interact with students outside of campaign appointment slots and designate a meeting as both fulfilling a campaign requirement and counting in campaign statistics. Use to designate any appointment contact for a student within a limited timeframe as part of a campaign, whether that meeting has concluded or is still in the future.
- From the tab, click the campaign name to open the campaign progression page.
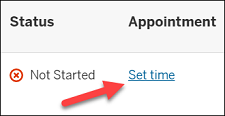
- Click .

- Choose a start and end time.
The current date and the time you choose will now appear on the progression page for that student. The links will continue to display for all student until they have individually met the appointment requirement for the campaign.
Manually mark campaign appointment attendance
An appointment is complete when a green checkmark icon (  ) displays to the right of it. For students to complete an appointment requirement, they must have a scheduled appointment (either through SAS or the campaign's ), and an appointment note must be submitted. There are several ways to get to the appointment note feature:
- Within campaigns: On the campaign progression page, find the student and click the appointment date you wish to change to "Completed". When the appointment contact note opens, your campaign profile, the contact type, and campaign tags will auto-populate. Tags may be changed for this note, but it will not impact the tags on the campaign.
- The AdRx "Appointments" page: Only campaign appointments scheduled via SAS Staff or SAS Student may be accessed from this area. For more about creating appointment notes, see the Submit contact and appointment notes in AdRx.
Go to your AdRx landing page and click the icon. On the "Appointments" page, click on the student's card. Your campaign profile and campaign tags will auto-populate the note.
- Individual student records via the AdRx "Summary" page: In the "Scheduled Appointments" area of a student record, SAS scheduled appointments will display the appointment type while those created using will be labeled as a "Campaign appointment":
- Click to add your campaign appointment note. Profile, contact type, and tags will auto-populate from the campaign. Changing profile or contact type may impact whether or not this is counted toward the campaign appointment requirement.
- To review your note, from the "Student Summary" page, click the tab.
- To view your changes in the campaign, click in the header, return to the campaign progression page, and navigate to the student. You should now see the in the attendance column for that appointment.
The student's status within the campaign may also change.
If a student schedules an appointment without using the link provided in the original campaign email message, you can count that appointment towards your campaign:
- Click to add your appointment note. If the student is part of a campaign, an interrupt will appear at the top of your note asking if you would like the appointment to fulfill a campaign requirement. Select .
- Under "Select Campaign", from the drop-down menu, select the appropriate campaign. A note will appear stating that linking a campaign to a contact note cannot be undone.
Profile, contact type, and tags will auto-populate from the campaign. Changing profile or contact type may impact whether or not this is counted toward the campaign appointment requirement.
- To review your note, from the "Student Summary" page, click the tab.
- To view your changes in the campaign, click in the header, return to the campaign progression page, and navigate to the student. You should now see the in the attendance column for that appointment. The student's status within the campaign may also change.
Actions only in activity campaigns
Manually update completion of requirements
Activity campaigns rely on data supplied by activity kiosks. Campaign owners/managers may also feel that non-kiosk activities submitted by students will satisfy campaign requirements. In these cases, campaign staff can manually change a student's status to .
Mark status as "Complete"
Students with a status of "Not Started" or are eligible to have their status changed to "Complete". Campaign staff can click vertical ellipses (  ) to the right of the student's name, and then click . In the modal, the user will add a reason for modifying the student's status to "Complete". The system will automatically capture the name of the user taking the action and the date.
Statuses that have been manually changed to "Complete" will display with "Status update" in the "Status column". The date and reason for the update will display, as well as the name of the campaign staff who changed the status.
Revert status
This functionality is only available for students whose status has been manually marked as "Complete". Eligible students will have a status of "Completed Status update". Click the vertical ellipses (  ) to the right of the student's name, and then click . Users must click for the status to be reverted. Users are not required to enter a reason, but it is best practice to include one.
View a student's activity
Users can view a student's kiosk activity within an activity campaign. Click the vertical ellipses (  ) to the right of the student's name to review kiosk activity between the campaign start and end dates. (If the campaign was closed before the end date, kiosk activity will be reduced to records between the campaign start and close date.)
All activity records during the campaign will display, even if they do not count toward campaign participation. Future upgrades include marking activities to show which count, granting exceptions, and filtering the data for ease of use.
This is document bega in the Knowledge Base.
Last modified on 2023-04-25 09:15:46.