Kiosk setup for administrators
On this page:
- Overview
- Administrative setup
- Create a kiosk
- Access Kiosk Manage Options
- Create a queue for an activity kiosk
- Manage a queue (and services)
- Kiosk reporting
Overview
Kiosk is a check-in system that lets you track and manage students in a variety of settings. You can use two different kiosk types for check-in: Office Kiosk or Activity Kiosk. Two elements of this tool influence what the student sees when checking in/out and how staff manage events or appointments: queues and services.
- Queues are the groups a student is virtually placed into when they check in or sign in.
- Services are optional items that students without an appointment or students attending an event can choose from during the check-in process to provide supplemental information to managers and administrators.
Administrative setup
This section is meant for the person who will manage the startup and close of a kiosk. A director might decide the unit is using Kiosk but delegate its implementation to someone else.
Create a kiosk
Once you have determined which kiosk type is appropriate for your needs or as new initiatives begin, a campus advising administrator can create your kiosk. A kiosk is created in the Campus Admin Services tool of Advising Records (AdRx). Only staff identified by their campus have the appropriate security to create, manage, and inactivate kiosks. In order to correctly set up a new kiosk, complete the following fields:
- Campus
- Kiosk Name (name to display on sign-in device)
- Kiosk Type ( or )
- Status ( or )
- Kiosk Assignees (optional)
Access Kiosk Manage Options
-
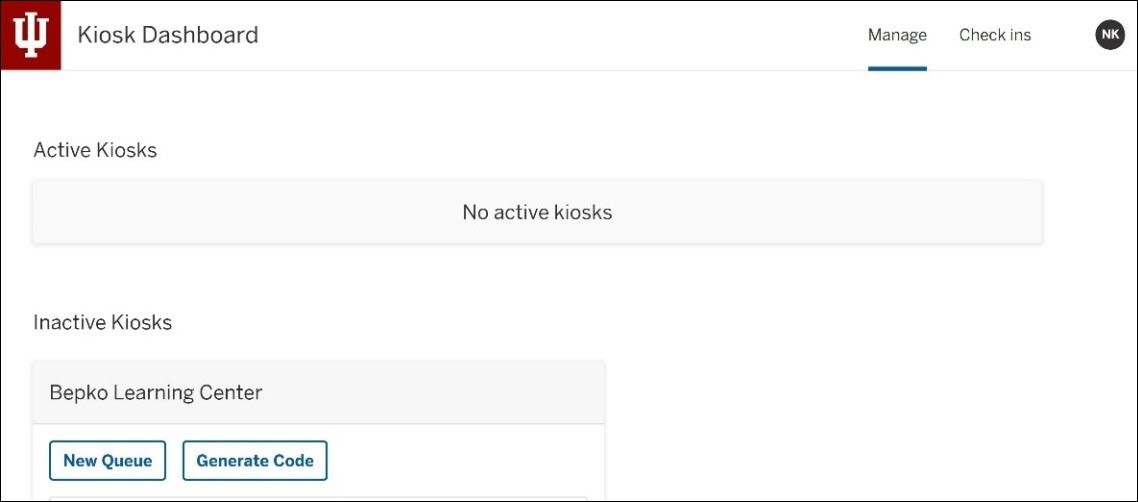
Go to Kiosk Admin Dashboard.
- When the dashboard displays, you will default to the tab.

Create a queue for an activity kiosk
- Navigate to the .
- Locate the kiosk for which you want to create a queue.
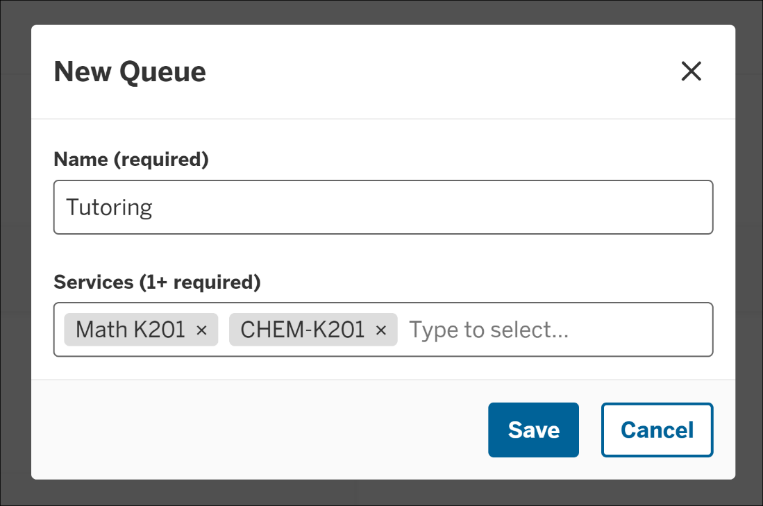
- Click , and enter the new queue name. It must be unique to the kiosk.
- Add at least one service.
- Students select a service during the check-in process; name each service carefully so students will understand which service to choose. Services provide a meaningful data point about the specifics of the activity or event.
- A queue has at least one predefined service, but the services can be refined for the "day of" as part of the start-up process.
- If a service does not exist, users can add the service to the queue. Added services are available for selection to all Kiosk administrators on the same campus (a Kokomo Kiosk administrator will not see Bloomington services, but can create new services that they may need).
- Each queue can have up to 30 services to choose from.
- Click .

You can create as many queues as you need, but you need to create at least one queue in order to start the activity kiosk.
Add additional services to an activity kiosk queue
- If the service has already been created:
- The pre-loaded options will be displayed as specific to a campus.
- Selecting from the pre-loaded services is optional.
- 10 possible matches are displayed for the pre-loaded options.
- If this is a new service:
- A new service requires at least two characters and a maximum of 30 characters for a service value.
- The separator/delimiter character is
,(comma). If you enter text and then a comma, it will conclude the service, and the service will be entered.
- Other ways to enter a service:
- Pick from the drop-down.
- Use the right-tab (
Tabkey). - Use the
Enterkey.
- To remove a service, the user can click the
xkey to remove.Backspacewill also remove the service prior to the cursor position. - No duplicate services are allowed to be entered.
- The possible characters include
a-z,A-Z,0-9, space, and the special characters- ! @ # $ & ( ) ' : _ + /.
Manage a queue (and services)
You can edit a predefined queue.
Edit a queue and services
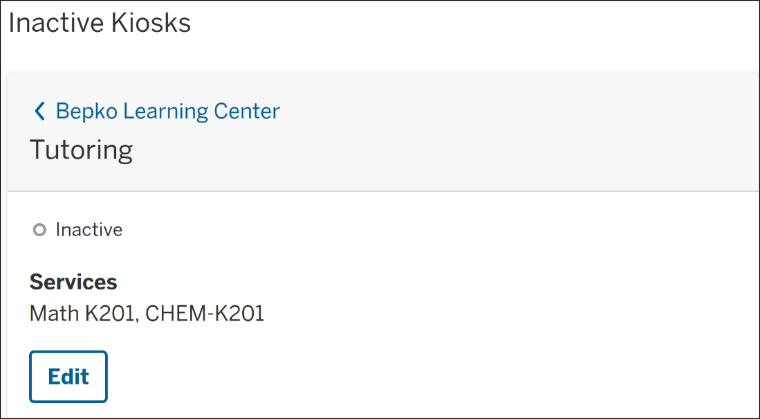
- On the Kiosk Dashboard, navigate to the queue you wish to edit; it must be inactive.

- Click .
- You can change the name of the queue, and add or remove services. You will not be able to save your changes unless there is at least one service.
- Click .
Your changes will be saved, and will be reflected when the queue is started.
Kiosk reporting
Decision Support offers reporting on Kiosk:
- Reporting is updated daily.
- Authorization is required to view Kiosk reports.
Access Kiosk reporting
- Navigate to One.IU's Decision Support.
- Search for
Kiosk. - From the search results, access a Kiosk report via its individual report task, the Kiosk report center, or the Academic Advising report center.
Alternatively, access to the Academic Advising report center is also available within AdRx; from the AdRx header, click and then .
Available Kiosk reports
- Kiosk - Students Claimed by Advisor: This report shows the number of students claimed by an advisor and the students that they claimed.
- Kiosk - Student Check-ins: This report shows the number of check-ins at a particular kiosk by appointment type and the students who checked in.
- Kiosk - Appointment Status Summary: All appointments that have gone through the kiosk will have a status: appointment, claimed, didn't wait, not seen, and waiting. This report shows a summary of what the final appointment status was for each appointment at the end of the day.
This is document bgjq in the Knowledge Base.
Last modified on 2023-07-31 12:36:34.