About Kiosk
On this page:
Overview
Kiosk is a check-in system that lets you track and manage students in a variety of settings. You can use two different kiosk types for check-in: Office Kiosk or Activity Kiosk. Two elements of this tool influence what the student sees when checking in/out and how staff manage events or appointments: queues and services.
- Queues are the groups a student is virtually placed into when they check in or sign in.
- Services are optional items that students without an appointment or students attending an event can choose from during the check-in process to provide supplemental information to managers and administrators.
Office Kiosk
Office Kiosk is a check-in system for student appointments. Students use a tablet or computer running Kiosk to check in for drop-in or scheduled appointments. Guests without an IU username or University ID (UID) can also check in.
Office Kiosk provides a data view for staff or personnel managing a waiting room or front desk area. By default, each Office Kiosk has three queues:
- Appointment queue:
- Students check in for appointments scheduled in SAS.
- AdRx users see check-ins on their "Appointments" page and can create an AdRx contact note for each appointment.
- Drop-in queue (optional and on by default):
- Students check in for a drop-in appointment.
- AdRx users see check-ins on their "Appointments" page; they can claim students and create an AdRx contact for each drop-in appointment.
- Guest queue (optional and on by default):
- Guests can sign in for a drop-in appointment and select an available advisor.
- AdRx users can see check-ins on their "Appointments" page and can claim guests.
Check in with Office Kiosk
- From the kiosk device, students enter their username or University ID and click .
- Students select either or .
Scheduled appointment
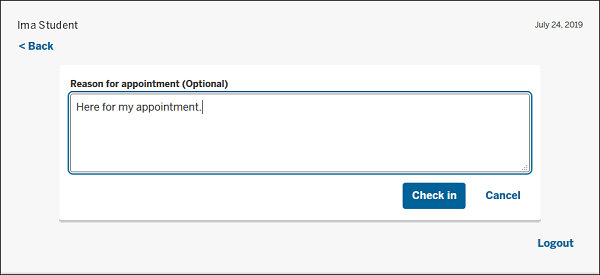
- A student arriving for a scheduled appointment selects from the kiosk.
- The student may optionally enter the reason for the appointment.

- The student clicks . A message indicates that the student is now checked in for the scheduled appointment.
- If a student selects and does not have an appointment that day, or if the student checks in after a scheduled appointment time, a message indicates no scheduled appointments today.
- The kiosk will automatically log out the student and return to the main check-in screen, where the student can then restart the check-in process to request a drop-in appointment instead.
Drop-in appointment
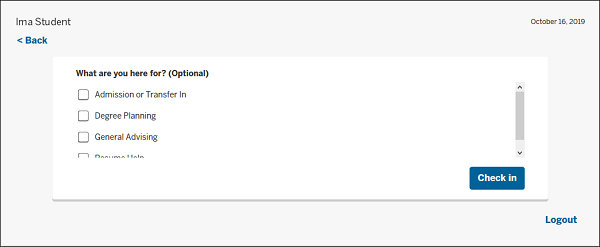
- The student selects from the kiosk, and may optionally enter the reason for the appointment.

- Optional services selection:
- If no services were added to this kiosk session, the student clicks .
- If services were added to this kiosk session, the student clicks to display the optional services menu.

- After clicking , a message indicates that the student has been added to the drop-in queue.
Guest check-ins
Kiosk allows a visitor who may not be a current student to check in and request to meet with an advisor.
- From the main check-in screen, a guest will click .

- The guest may select a specific advisor or the first available advisor. The selection of a specific advisor is informational only and does not assign the guest to that person.

- Kiosk prompts for the guest's first and last name, email address, phone number (all required), and the reason for the appointment (optional).
- Optional services selection:
- If no services were added to this kiosk session, the guest clicks .
- If services were added to this kiosk session, the guest clicks to display the optional services menu.

- Once the information has been entered, the guest clicks , and a confirmation page displays.
Activity Kiosk
Activity Kiosk lets you track student attendance at an event. Students use the Activity Kiosk to check in for an event; this can be a one-time event or recurring event.
Activity Kiosk supports administrator check-in and a data view for administrators. There is no "claim" process and no integration with SAS or the "Appointments" page.
Activity Kiosk has a single type of queue. Queues are created and defined by Kiosk administrators. Each queue has at least one preset service. While a kiosk can have more than one defined queue active at a time, you can only run one queue at a time on a device (you can run the same queue on more than one device, but you may not run more than one queue on a single sign-in device).
Student check in/out with Activity Kiosk
- From the kiosk device, the student enters his or her username or University ID, and then clicks .
- The student selects or .
- If the student selects :
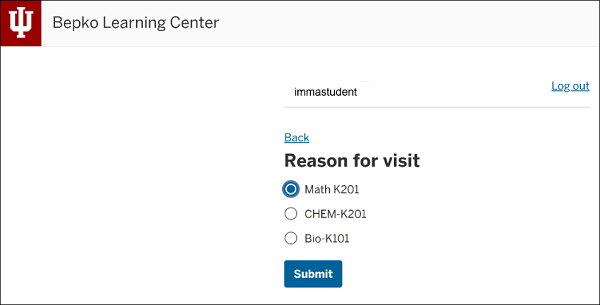
- If there are multiple services, the student is presented with the available options.
- If there is only one service available, the student doesn't have to select the service and is taken to the confirmation page.
- A successful check-in message displays, and the student will automatically be logged out.
- If the student selects : The student sees the confirmation message and will be automatically logged out.
Check-out is optional. When there is check-out data, the system calculates how much time the student spent on the activity.
- If the student selects :
Which Kiosk to use
An office may use both Activity Kiosk and Office Kiosk, as well as multiple queues, depending on the populations and events that office is managing. Each active Office Kiosk and Activity Kiosk will need a unique sign-in device. A single device cannot support more than one sign-in option at this time; however, the device used for Kiosk sign-in does not need to be the same one each time, so offices may deploy their devices as needed that day.
Scenarios for using Office Kiosk
- An advising office without a front desk person needs to handle both drop-ins and appointments to make sure students are seen on time and in order.
- A tutoring office wants to organize student and tutor meetings for drop-in tutoring, making sure to match students with a tutor for their subject, and helping them in the order they signed in.
- A faculty advisor wants to see students in the order they arrived for office hours before a test, and wants to be aware if additional students sign in.
Scenarios for using Activity Kiosk
- Organizers of a career fair want to track who attends the fair, high traffic times, and how much time students spend in the fair.
- Mandatory or optional study groups need to track who attends and for how long.
- Offices holding events for prospective majors want to track who attends.
- Offices holding orientation events would like to track who attends and high traffic times.
- Students need to sign in to get extra credit for attending an event.
This is document bgju in the Knowledge Base.
Last modified on 2022-01-03 13:43:32.