About classroom document cameras
On this page:
- Overview
- Hovercam Solo 8/8 Plus
- AVerVision F17-8M
- Epson DC-21
- HoverCam Ultra 8
- ELMO P10
- IPEVO VZ-X
- WolfVision VZ-8.UHD
- WolfVision VZ-8light4
- Get help
Overview
The most common document camera models in IU classrooms are listed below with photos. Click a document camera name to see specific information on using it in a classroom. If the document camera model in your classroom is not listed, see Get help.
| Model | Photo |
|---|---|
| Hovercam Solo 8/8 Plus | 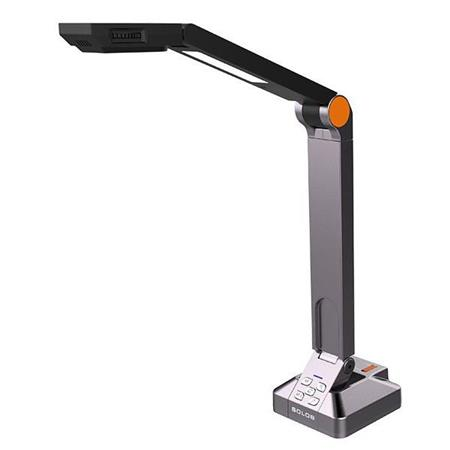 |
| AVerVision F17-8M | 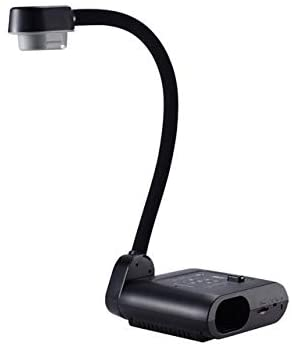 |
Epson DC-21
(also DC-20, DC-12, and DC-11) |
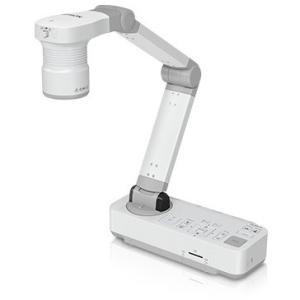 |
| HoverCam Ultra 8 | 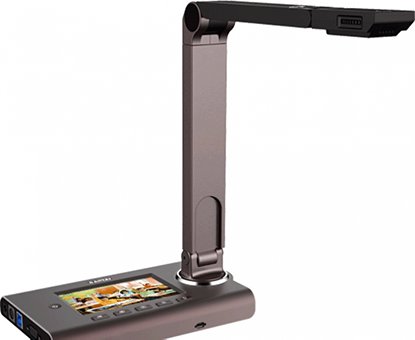 |
| ELMO P10 | 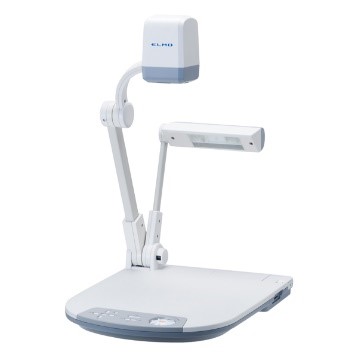 |
| IPEVO VZ-X | 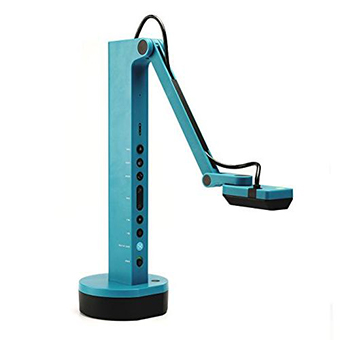 |
| WolfVision VZ-8.UHD | 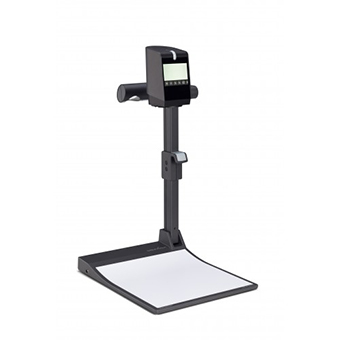 |
| WolfVision VZ-8light4 | 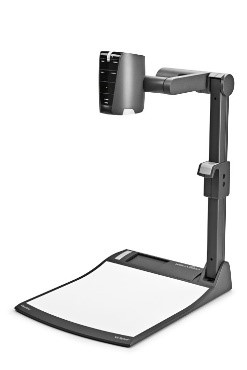 |
Hovercam Solo 8/8 Plus
- Turn on the document camera: This camera has no on/off button. It is powered by the USB cable that is connected to the desktop computer.
- Autofocus: Press the AF button on the base of the camera to automatically focus the image. Press the AF-L button to lock the focus at the current position.
- Rotate: Press the center button on the base of the camera to rotate the image 180 degrees.

- Zoom: Press the + and - zoom buttons on the base of the camera to zoom in and out.
- Turn on the built-in lamp: Slide the button on the top side of the camera arm to turn on the built-in LED light.
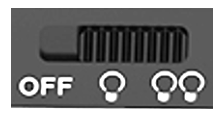
For details, see the Hovercam Solo 8/8 Plus User Manual.
AVerVision F17-8M
- Turn on the document camera: Press the power button on the base until the LED indicator turns green.

Select source: Press the CAMERA/PC button on the base to select the internal camera.
- Autofocus: Press the AF button on the base to automatically focus the image.
- Zoom: Press the + and - zoom buttons on the base of the camera to zoom in and out.
- Turn on the built-in lamp: Press the LAMP button on the base to turn on the camera's built-in LED light.
For details, see the AVerVision F17-8M user manual.
Epson DC-21
- Turn on the document camera: When the camera is on, the power button displays a steady blue light. If the camera is not already on, press the power button.
Select source: Ensure the top source light next to the icon of a document camera is illuminated.

- Autofocus: Briefly press the autofocus button once to automatically focus the image.
- Zoom: Press the + and - zoom buttons to zoom in and out.
- Turn on the built-in lamp: The lamp switch (labeled with the
 icon) is located on the camera head. Slide the switch to select Bright, Dim, or Off.
For details, see the Epson DC-21 User's Guide.
HoverCam Ultra 8
-
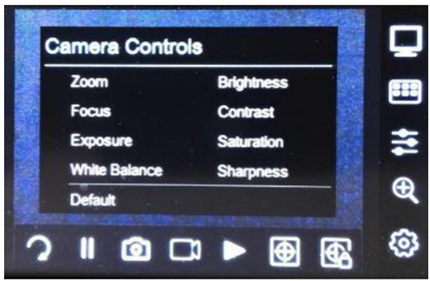
Turn on the document camera: If the camera is not already powered on, press the power button on the right side of the camera's built-in LCD panel. When powered on, control icons appear on the bottom and right sides of the LCD panel.
-
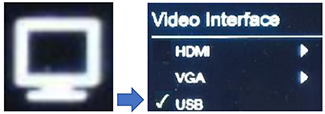
Check the video interface: The camera's video output must be set to USB in order to share the content in Zoom. To confirm this setting, touch the top right icon on the document camera's LCD panel and ensure there is a checkmark next to "USB".
- Autofocus: Press the autofocus button (
 ) to automatically focus the image.
 - Zoom: Press the zoom button (
 ), and then move the slider to zoom in and out.
 - Rotate the image: Press the rotate button (
 ) to rotate the camera image.
For details, see the HoverCam Ultra 8 User Manual.
ELMO P10
-
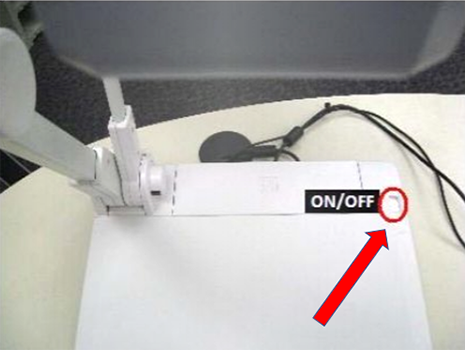
Turn on the document camera: If the camera is not already on, press the power button at the top right of the base.
-
Select source: Ensure the button next to the icon of a document camera is illuminated.
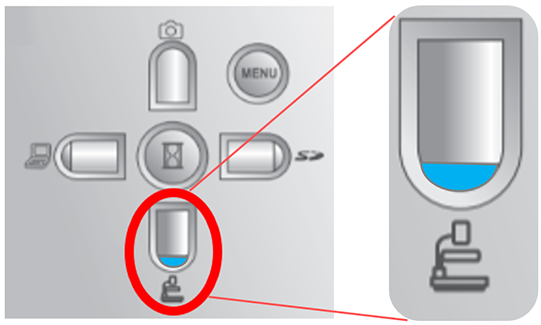
-
Zoom: Use the wheel on the base of the camera to zoom in and out; rotate the wheel clockwise to zoom in, or counter-clockwise to zoom out.
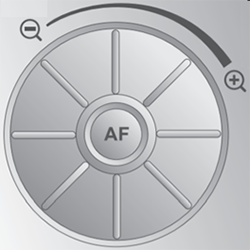
-
Autofocus: Press the AF button in the center of the zoom wheel to automatically focus the image.
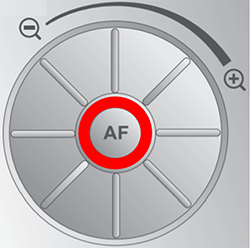
-
Turn on the built-in lamp: Press the top button to the left of the zoom wheel to turn on the camera's built-in lamp.
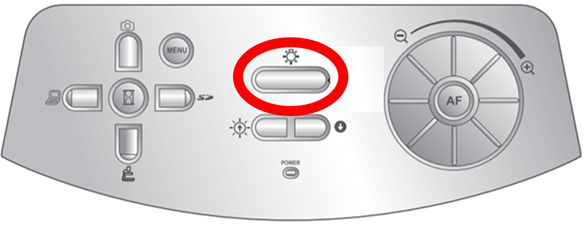
For details, see the ELMO P10 Instruction Manual.
IPEVO VZ-X
-
Turn on the document camera: Slide the power switch down to turn the camera on. Slide the switch down to turn it off.

- Zoom: Press the + and - zoom buttons to zoom in and out.
- Autofocus: Briefly press the autofocus button (
 ) once to automatically focus the image.
 - Rotate: Press the rotate button (
 ) to rotate the image.
 - Turn on the built-in lamp: Press the lamp button (
 ) to turn on the camera's built-in lamp.
For details, see the IPEVO VZ-X Quick Start Guide.
WolfVision VZ-8.UHD
-
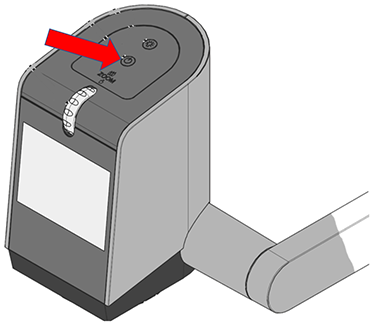
Turn on the document camera: Press the power button on the top of the camera to turn it on.
- Select source: Use the (
 ) button on the camera's touch screen to toggle between available sources. Select to see the image from the built-in camera.
 -
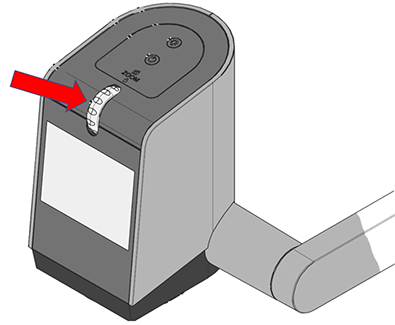
Zoom: Use the zoom wheel on the top of the camera to zoom in and out.
- Autofocus: The LCD screen on the top of the document camera shows a preview of the image. Tap anywhere on the preview to automatically focus on that area of the image. [Not clear where this icon appears then:
 ]
] -
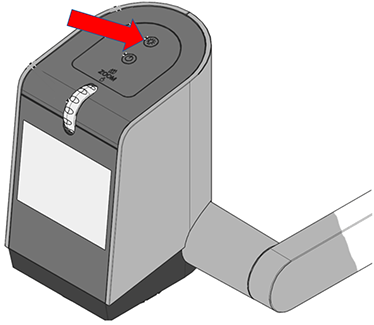
Turn on the built-in lamp: Press the lamp button on the top of the camera to turn on the built-in lamp.
For details, see the WolfVision VZ-8.UHD user manual.
WolfVision VZ-8light4
-
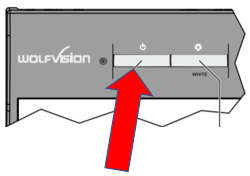
Turn on the document camera: If the camera is not already on, press the power button on the base.
-
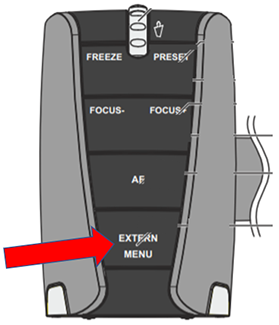
Select source: Press the EXTERN/MENU button on the top of the camera to select the image from the built-in camera. Make sue the light next to EXTERN is not illuminated.
-
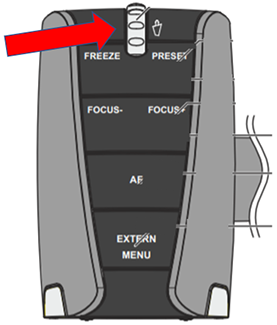
Zoom: Rotate the zoom wheel on the top of the camera to zoom in and out.
-
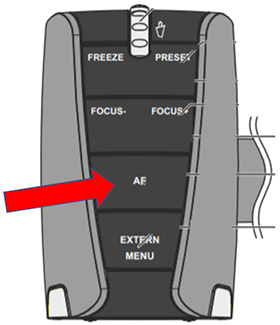
Autofocus: Press the AF button to turn autofocus on or off. When autofocus is on, the light will be illuminated.
-
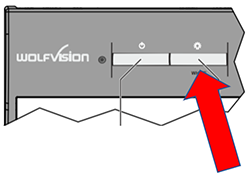
Turn on the built-in lamp: Press the button to the right of the power button on the camera base to turn on the built-in lamp.
For details, see the WolfVision VZ-8light4 Instructions.
Get help
For help or to learn more, contact UITS Learning Spaces Support.
This is document ariq in the Knowledge Base.
Last modified on 2022-12-13 13:32:55.